Eploy
Follow these steps to connect Eploy with Gaia successfully.
Written By gaia
Ensure you have Admin privileges for your Eploy account.
Getting your Subdomain
1
Find the Subdomain
You can find the subdomain in the URL of your Eploy account by taking the portion that appears before .eploy.net and after https://.
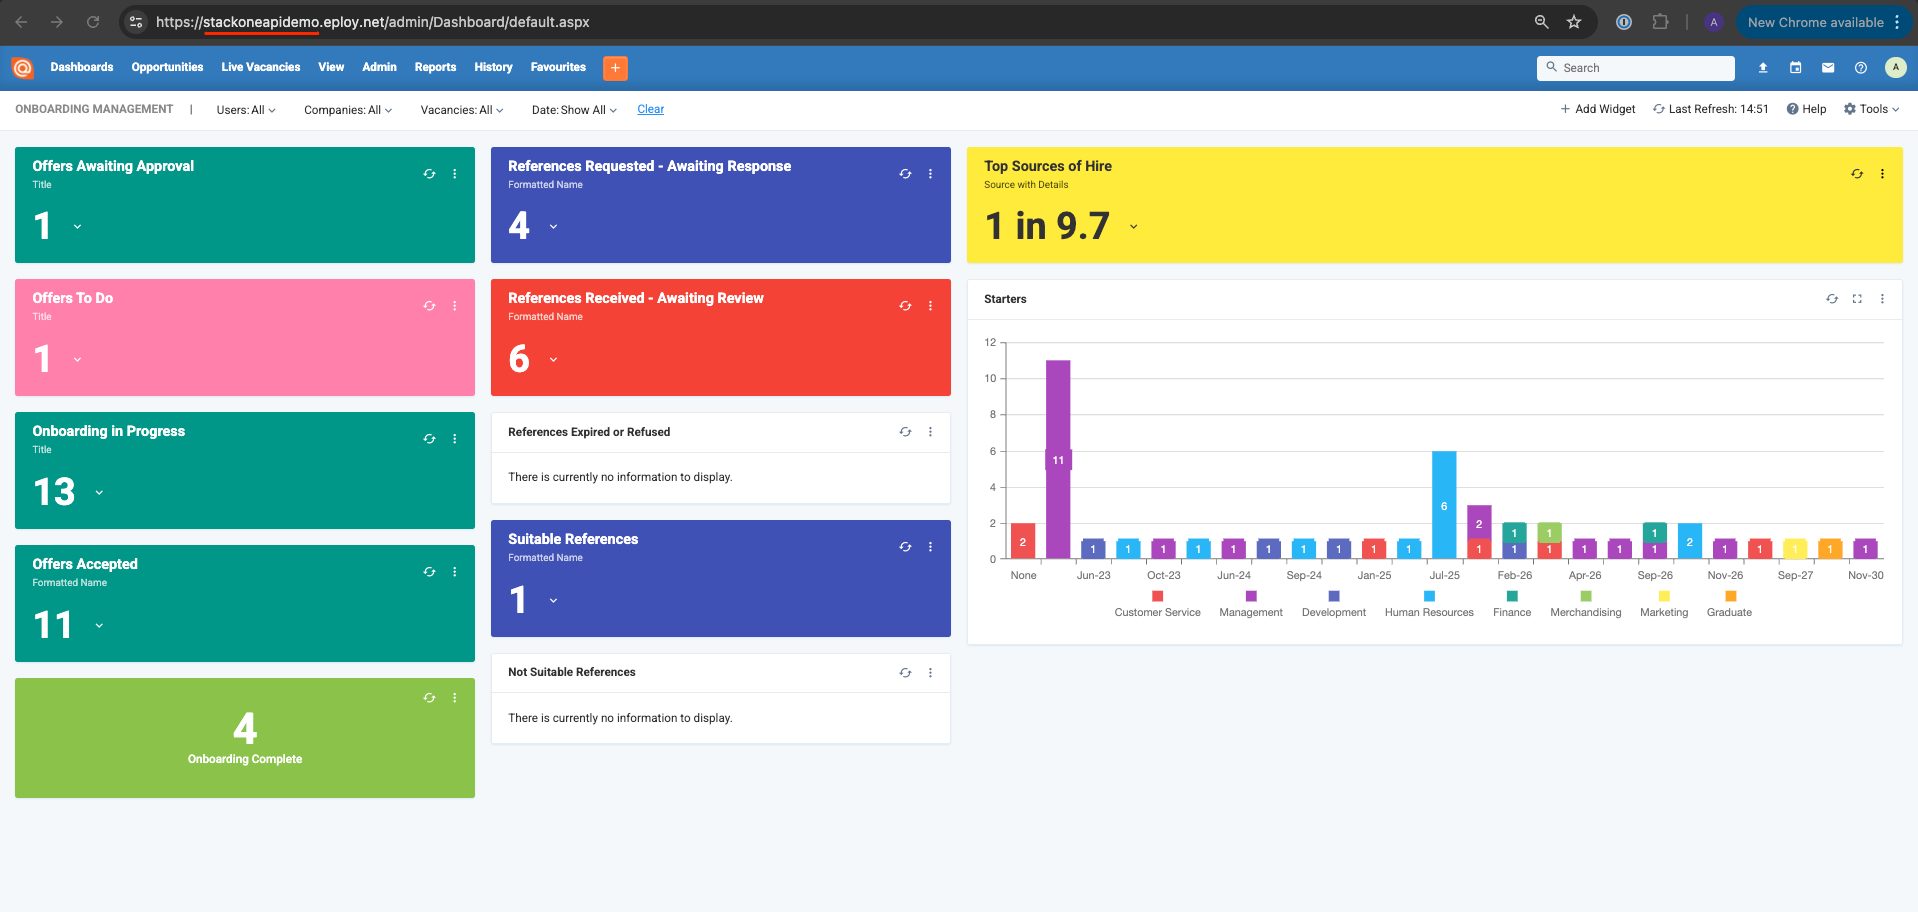
In this example, the value would be: gaiaapidemo
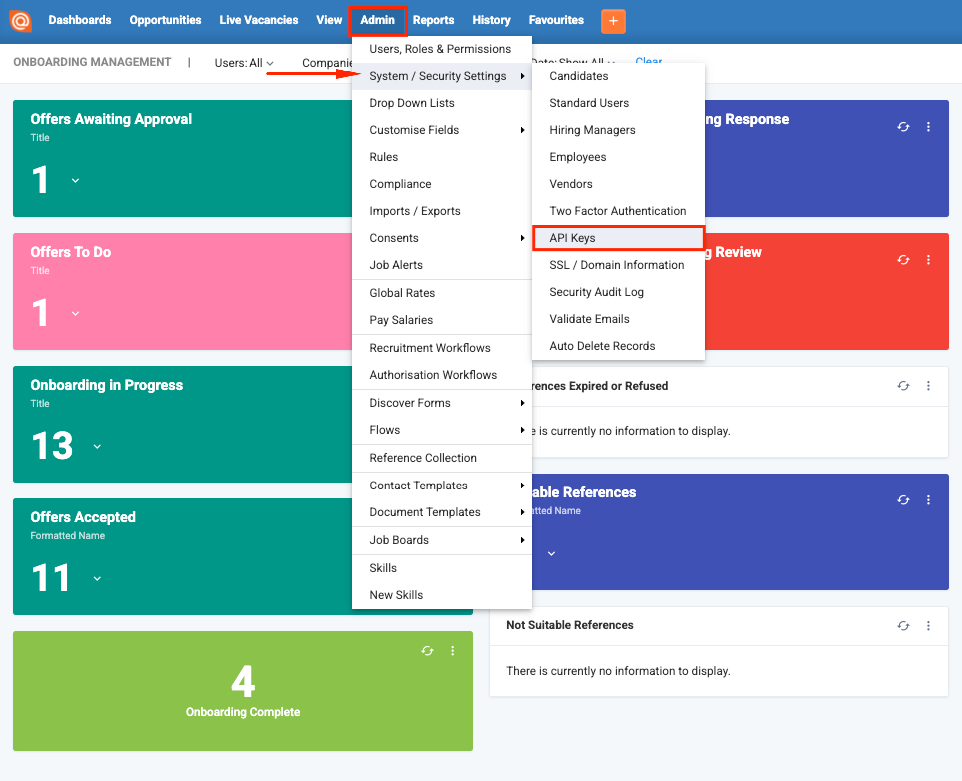
Generating Client Id and Client Secret
1
Navigate to API Keys
In the top navigation bar go to Admin → System / Security Settings → API Keys.
2
Create a New API Key
On the top-right select New → Rest API.
3
Name the API Key
Enter title for the API Key, for example: Gaia.Select an API User for your API Key to use and click Save.
4
Record Client ID, Client Secret and Assign Permissions
Your Client ID and Client Secret will be generated and displayed to you. Copy them to a safe place.Assign API permissions based on the integration requirements by clicking on Add button.
Select and enable each of the API permissions below used in this integration, and click Save for each.
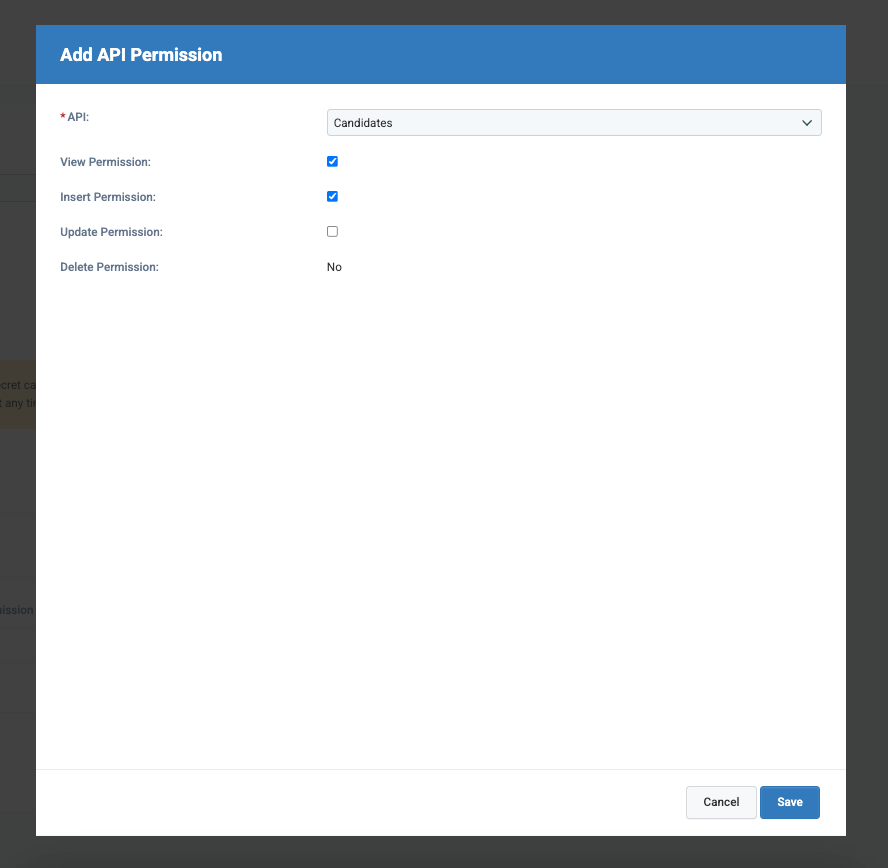
Click Save.
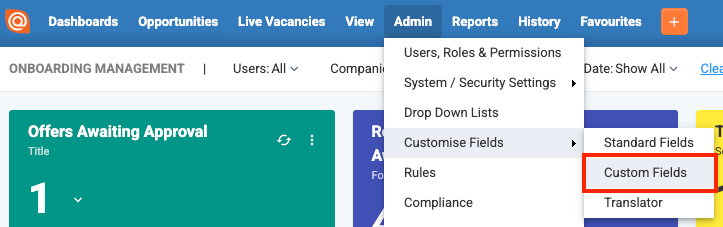
Getting Your Candidate Custom Fields (optional)This integration supports Candidate Custom Fields set up in your Eploy instance. When connecting your account, you can enter the Custom Field IDs you wish to be included.
1
Navigate to Custom Fields
In the top navigation bar go to Admin → Customise Fields → Custom Fields
2
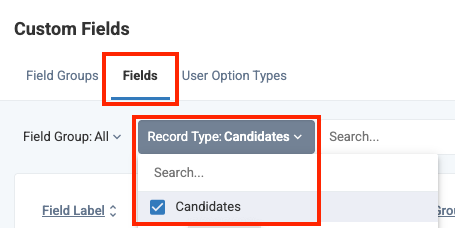
View Candidate Custom Fields
Under Custom Fields, select the Fields tab. Then click the Record Type button and select Candidates to view all of the Candidate Custom Fields in your Eploy instance.
3
Note Field IDs
In the filtered list of Candidate Custom Fields, note all of the Field IDs for the Custom Fields to be included in this integration.
You will enter a list of these Field IDs when connecting your account.
Connecting with Gaia
1
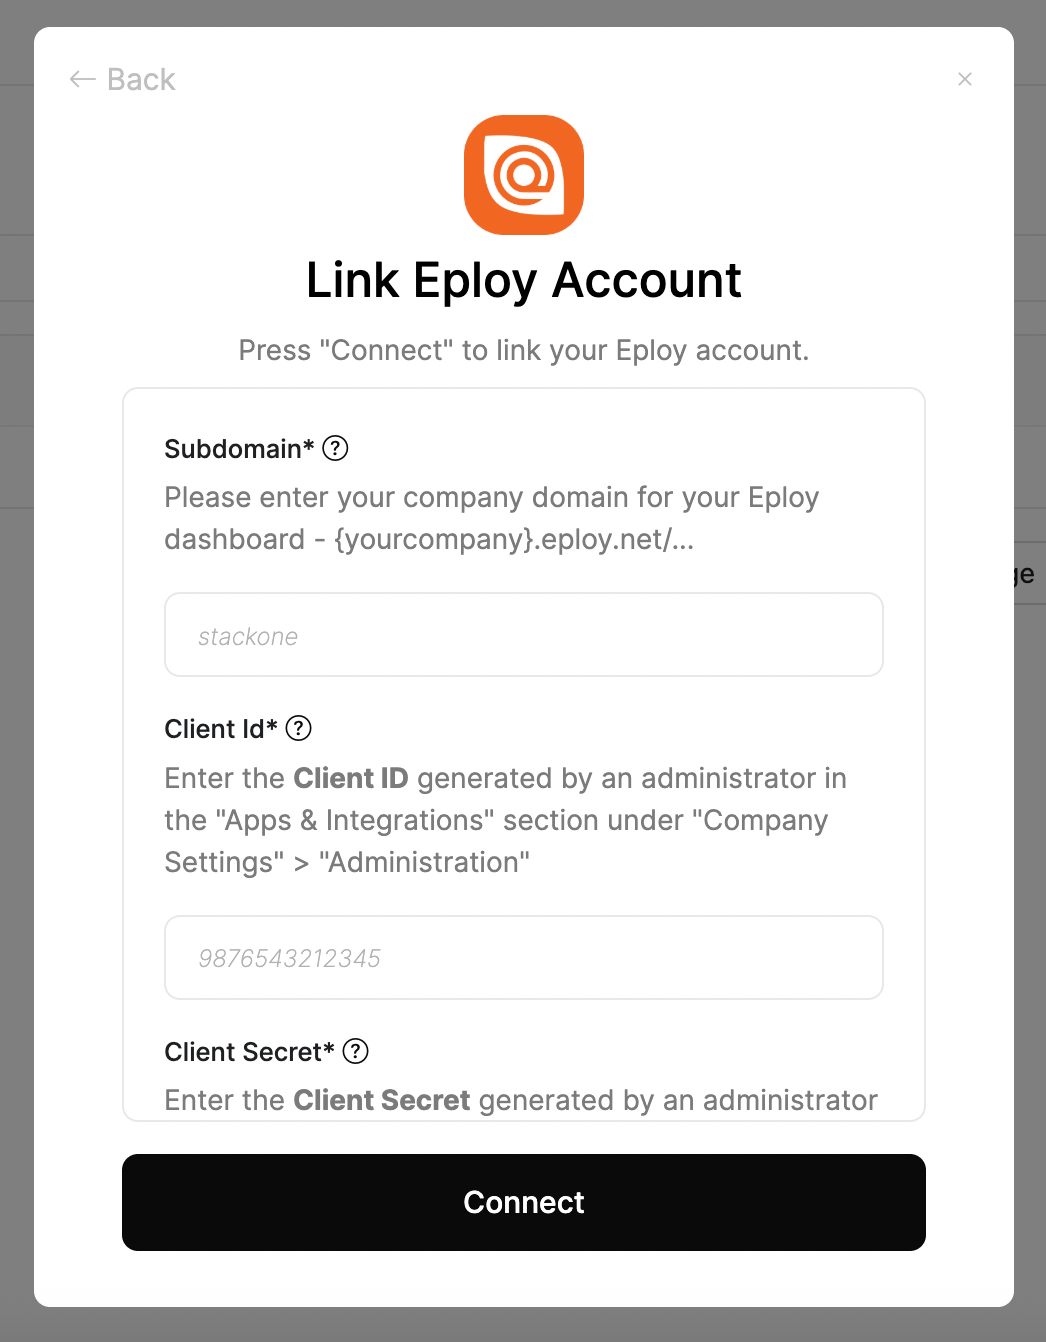
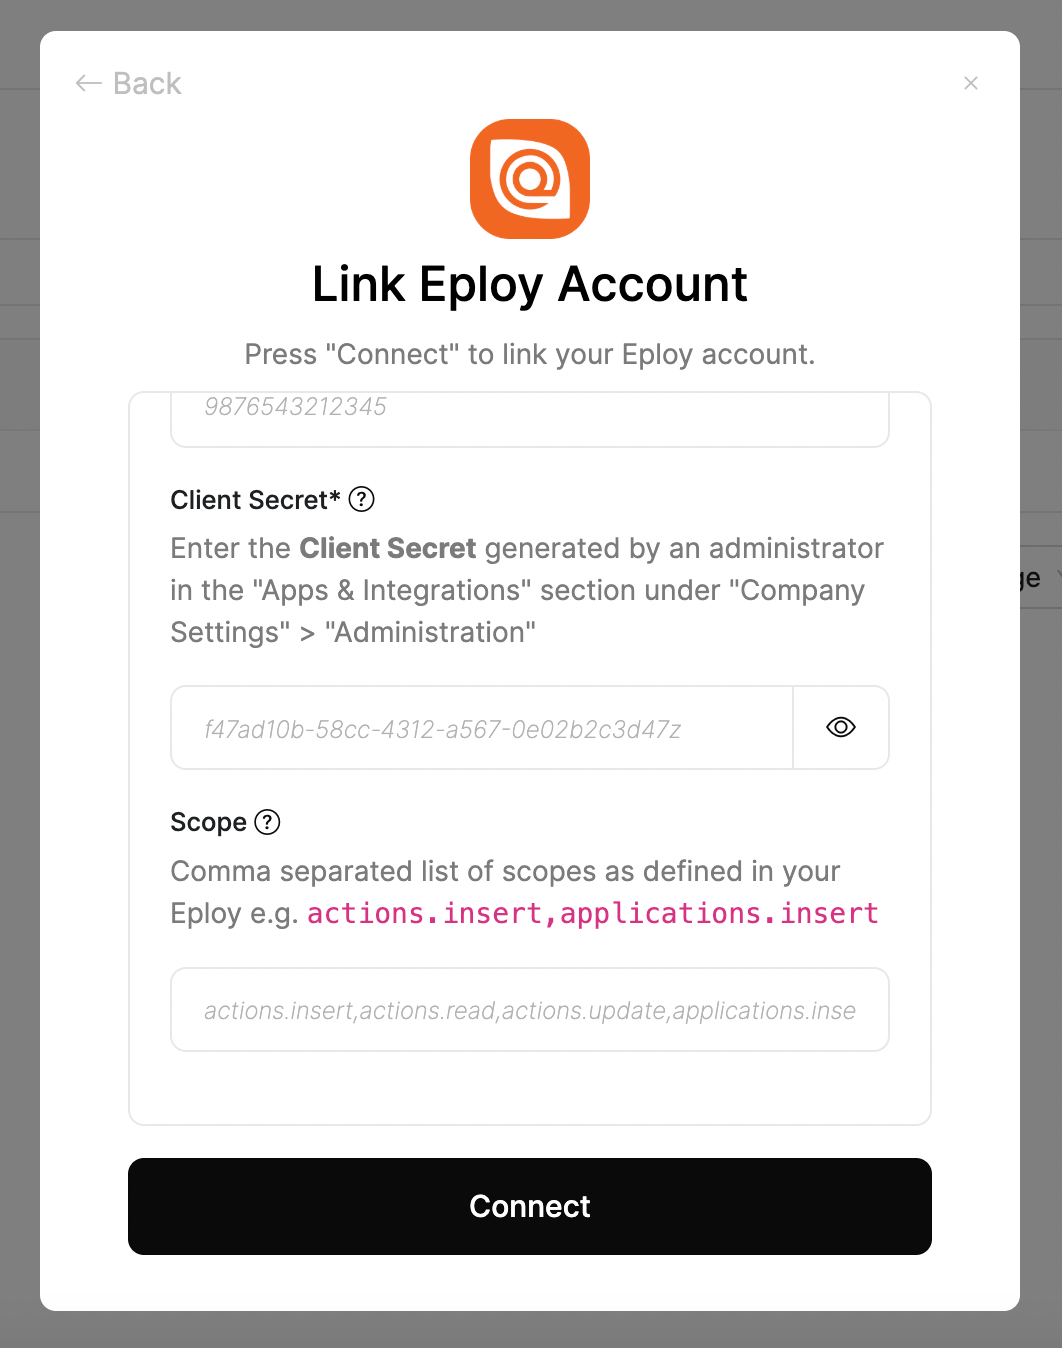
Enter the Details
Upon reaching the Link Account page, enter the Subdomain, Client ID, and Client Secret gathered from the steps above.Enter scopes to optionally restrict this API key’s access.Only the scopes assigned above during API key configuration will be allowed — see the full list here.To optionally include Candidate Custom Fields, enter the comma-separated list of Candidate Custom Field IDs.Example: 104,215,392,449
Click Connect.
Congratulations, you’re all set! If you face any issues with the steps mentioned above, please contact your account manager.