Bullhorn Recruitment Cloud - Salesforce (OAuth)
Follow these steps to connect Bullhorn Recruitment Cloud - Salesforce with Gaia successfully.
Written By gaia
Ensure that your Bullhorn Recruitment Cloud - Salesforce account has Admin privileges.
Log in to Salesforce
Log in to your Salesforce instance.
Find your Bullhorn Recruitment Cloud - Salesforce Salesforce URL
Your Salesforce URL can be found in the URL when logged in to Bullhorn Recruitment Cloud - Salesforce. Given the URL:https://mycompany.salesforce.com/dashboard/settings, the Salesforce URL ishttps://mycompany.salesforce.com.
Create your Client ID and Client Secret
This integration will authenticate on behalf of a registered application in Bullhorn Recruitment Cloud - Salesforce.
1
Create your Salesforce OAuth Application
Follow the Salesforce Client Credentials Guide to create your Salesforce OAuth Application. Store your Client ID and Client Secret securely to be used in a later step. The integration accesses the following Salesforce objects. Please ensure that the associated User has read or read/write access to these as required for your use case:
TR1__ContactDocument__c
TR1__Application__c
TR1__Job_Board_Application__c
Contact
TR1__Job__c
Write operations may trigger automations depending on your Salesforce configuration, that may require additional permissions.
Enter Job Board Application Custom Fields (optional)
The integration utilizes the following fields from the SalesforceTR1__Job_Board_Application__cmodel:
IdNameTR1__Job__cTR1__Applicant__cTR1__Job_Board_Source__cTR1__Source__cTR1__Status__cCreatedDateLastModifiedDate
To include any additional fields from this model, enter a comma-separated list of the field names.
Enter Shortlist Application Custom Fields (optional)
The integration utilizes the following fields from the SalesforceTR1__Application__cmodel:
IdTR1__Applicant__cTR1__Job__cTR1__Stage__cTR1__ATS_Stage__cTR1__Status__cTR1__Source__cTR1__Job_Board_Source__cCreatedDateLastModifiedDate
To include any additional fields from this model, enter a comma-separated list of the field names.
Enter Candidate Custom Fields (optional)
The integration utilises the following fields from the Salesforce Contact model:
IdFirstNameLastNameNameEmailTR1__Work_Email__cTR1__Secondary_Email__cMain_Email__cPersonal_Email__cMobilePhonePhoneHomePhoneAssistantPhoneWork_Phone__cOtherPhoneTitleCompany_Name_Text__cTR1__Candidate_Status__cTR1__LinkedIn_ProfileUrl__cMailingCountryCreatedDateLastModifiedDate
To include any additional fields from this model, enter a comma-separated list of the field names.
Enter Job Custom Fields (optional)
The integration utilizes the following fields from the Salesforce TR1__Job__c model:
IdNameTR1__Job_Number__cTR1__Job_Title__cJob_Description__cTR1__Status__cTR1__Hiring_Manager__cTR1__Is_Confidential__cCreatedDateLastModifiedDate
To include any additional fields from this model, enter a comma-separated list of the field names.
Connecting with Gaia
1
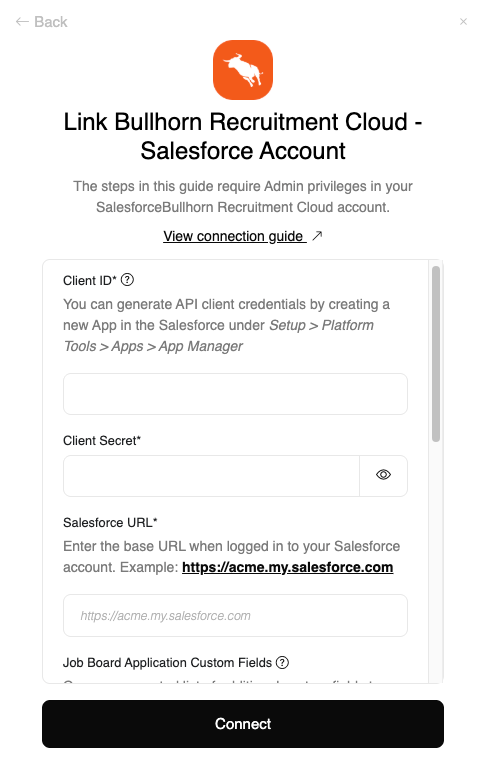
Upon reaching the Link Account page, enter the credential(s) from the previous steps:
Client ID
Client Secret
Salesforce URL
Job Board Application Custom Fields (optional)
Shortlist Application Custom Fields (optional)
Candidate Custom Fields (optional)
Job Custom Fields (optional)
Proceed by clicking the Connect button.
Congratulations, you’re all set! If you face any issues with the steps mentioned above, please contact your account manager.
Available data from the provider:
Applications
Applications Documents
Application Notes
Candidates
Application Stages
Job Postings
Jobs